Process Checklists - MIS Scheduler — Edit
Last updated on: July 1, 2026 | Updated by: MAGNI Docs Team
The Admin Checklists Process MIS Scheduler — Edit page allows Administrators to create and modify automated Management Information System (MIS) schedules. These schedules automatically compile and email specified checklist reports (widgets) to designated users at set intervals, ensuring stakeholders receive regular updates on process performance.
Page Sections
Breadcrumbs & Header Actions
The top of the page features a breadcrumb navigation trail to help you easily return to the Dashboard, Process Checklists, or the main MIS Schedules list.
To the right of the breadcrumbs, you will find the primary action buttons:
- Save: Saves your changes and activates the schedule. This button is disabled if any required fields are missing or if there are validation errors.
- Delete: This button is only visible when editing an existing schedule. Clicking it permanently deletes the schedule.
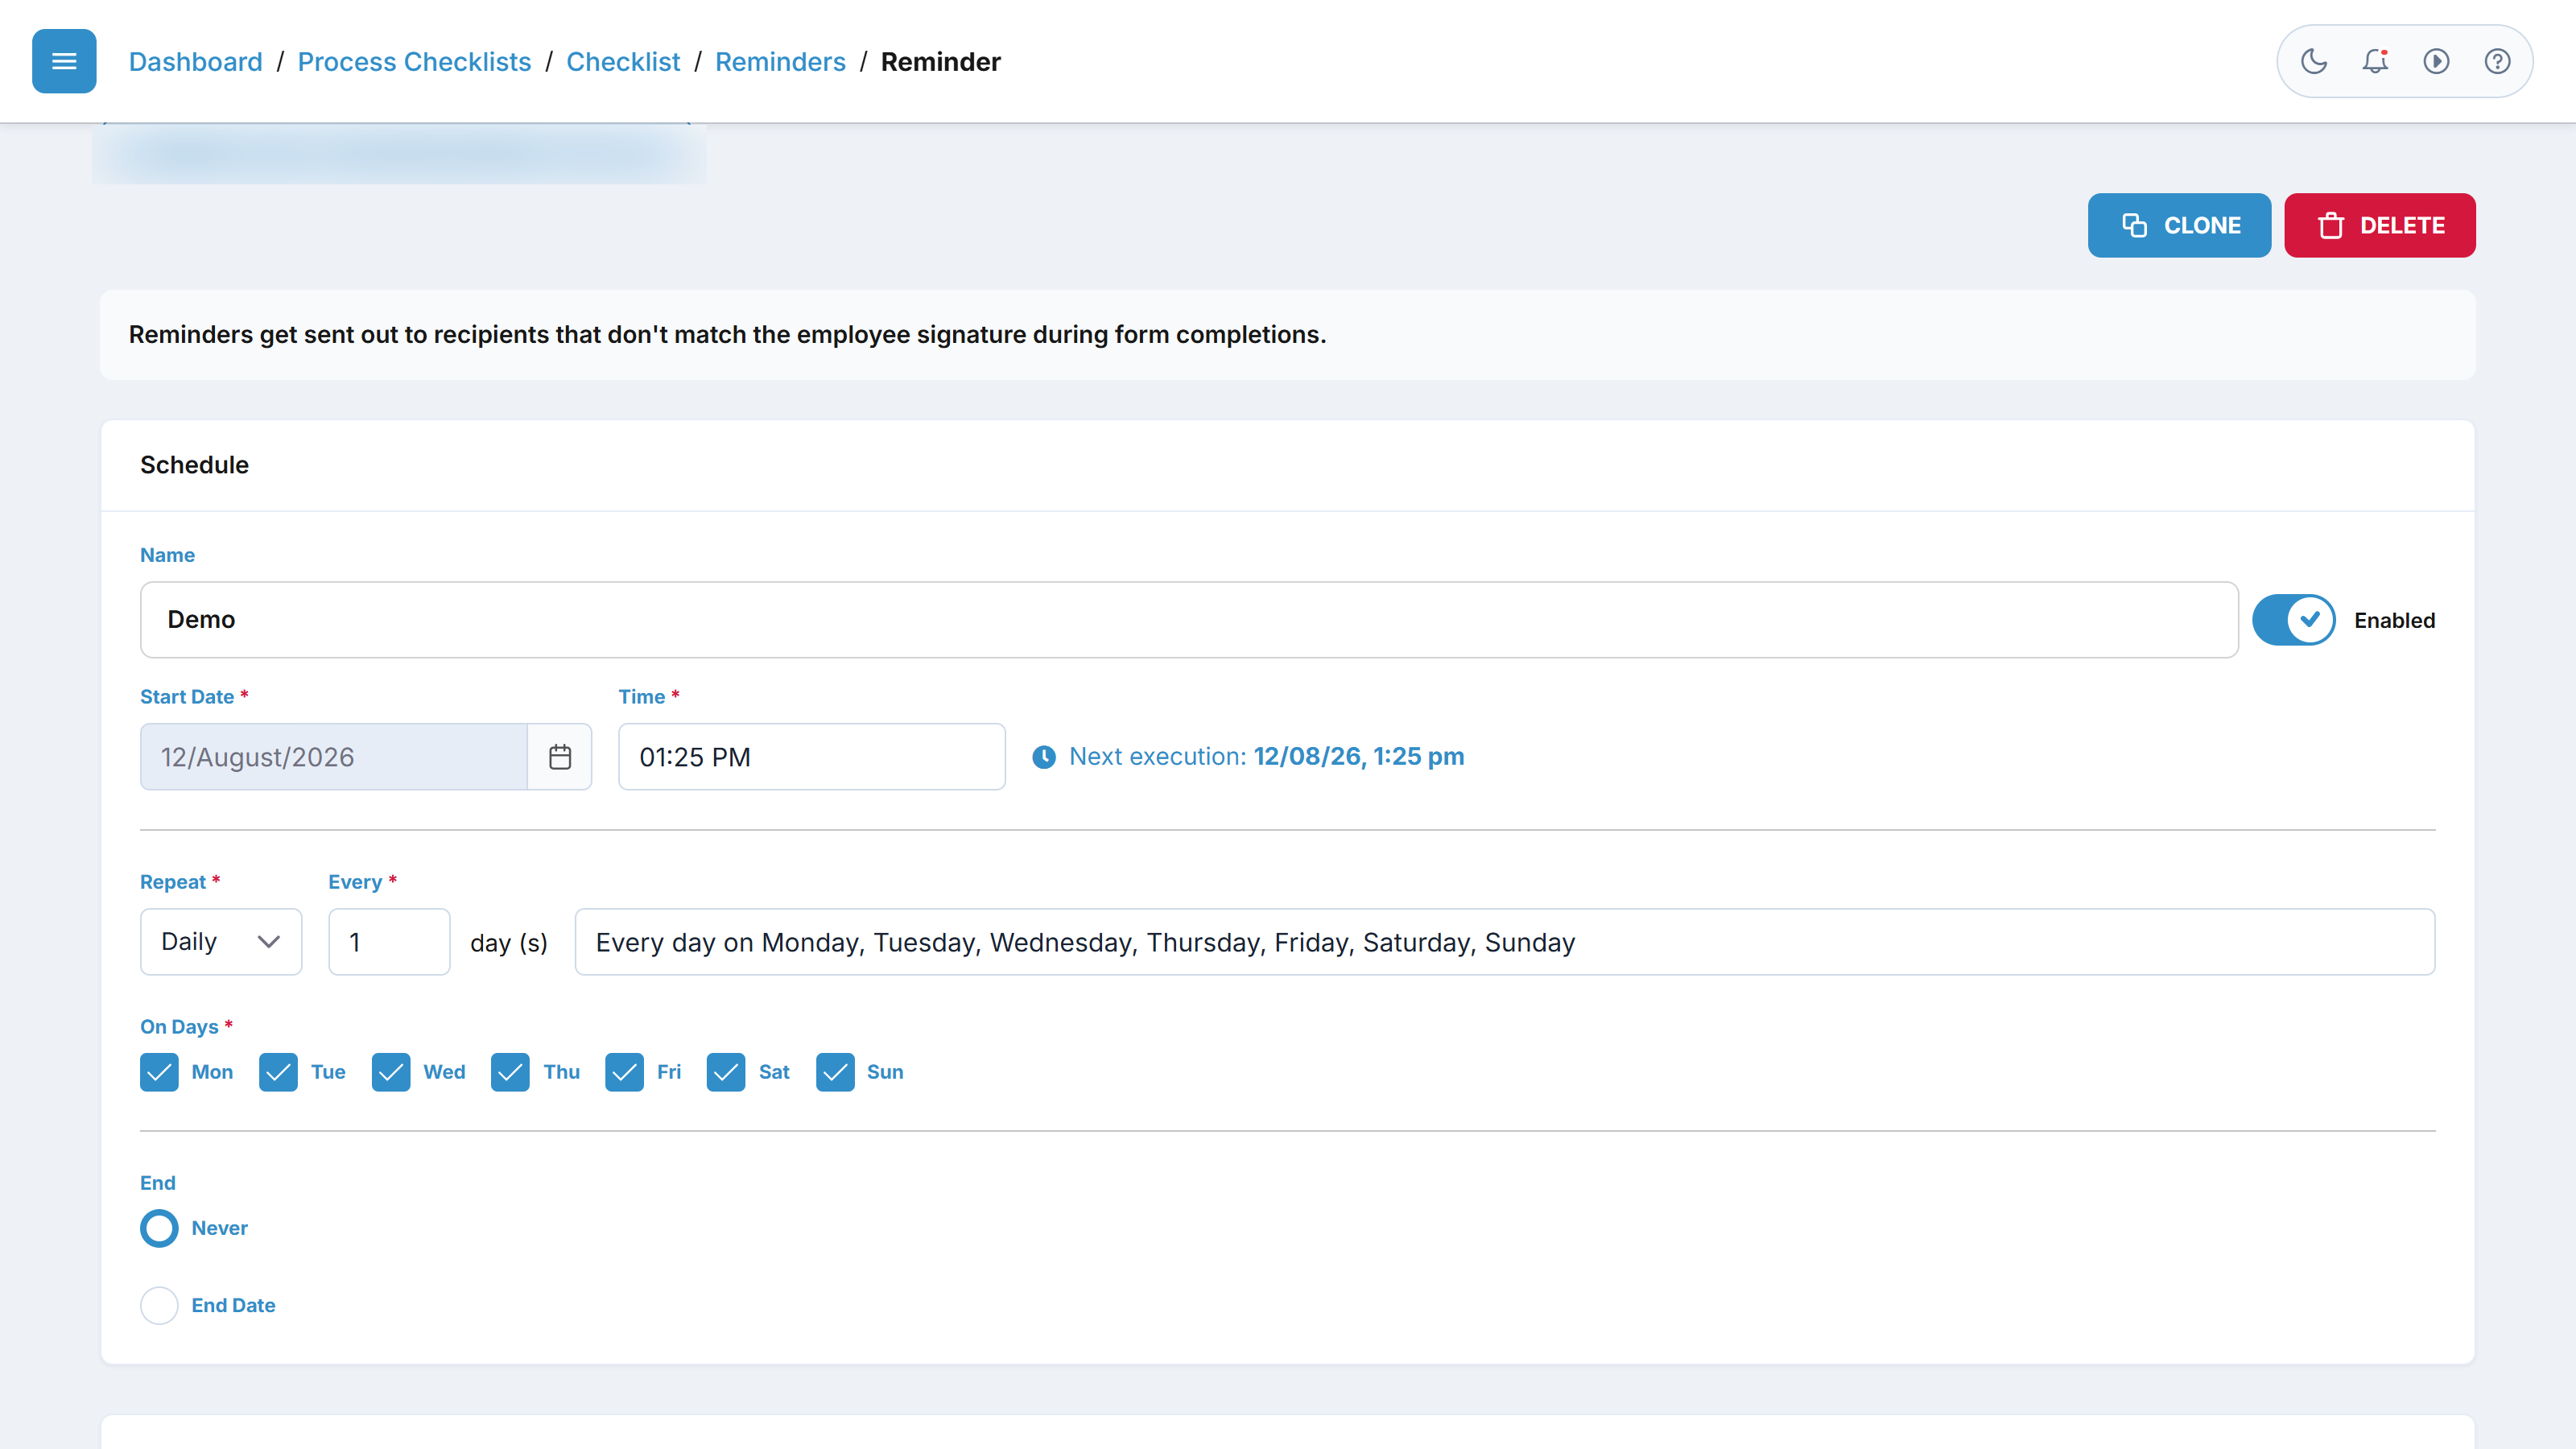
Schedule
This section defines when and how often the automated report is generated and sent.
- Name: Enter a descriptive name for the schedule (e.g., "Daily MIS schedule"). This is a required field.
- Start Date: Select the date when the schedule should begin running. This is a required field.
- Time: Specify the exact time of day the report should be generated and emailed. This is a required field.
- Repeat: Select the frequency interval (e.g., Daily, Weekly, Monthly) from the dropdown menu. This is a required field.
- Every: Enter a number to define the interval multiplier (e.g., repeat every "1" day or every "2" days). This is a required field and must be at least 1.
- On Days: Checkboxes for Monday through Sunday. Select the specific days of the week you want the schedule to run.
- End: Choose when the schedule should stop running:
- End Date: Select a specific date. The end date must be on or after the Start Date.
- Never: The schedule will run indefinitely.
Recipients & Reports
This section determines who receives the report and what data is included in it.
- Users: Select the users who will receive the scheduled email. You can select a maximum of 10 users. This field is searchable and features infinite scrolling to help you find users quickly. Selected users are displayed as cards below the field, showing their full name, username, and email. You can remove a user by clicking the "X" button on their card. This is a required field.
- Tag Type: Select the tag type associated with the checklists you want to report on. This is a required field.
- Tags: Select specific tags to filter the checklist data included in the report. Selected tags appear as removable chips below the field. This is an optional field.
- Categories: Select specific checklist categories to filter the report data. Selected categories appear as removable chips below the field. This is an optional field.
- Widgets: Select the report widgets to include in the emailed report. The available widgets are automatically filtered based on your selected "Repeat" frequency. This is a required field.
- Widgets Order: This section appears dynamically once you have selected one or more widgets. It allows you to drag and drop the selected widgets to arrange the order in which they will appear in the final email report.
- Previous Day: Data will be qualified for the previous day from 12:00 AM to 11:59 PM.
- Current Day: Data will be qualified for the current day from 12:00 AM to [current time].
Common Actions
| Action | How to do it |
|---|---|
| Save a Schedule | Fill in all required fields in the Schedule and Recipients & Reports sections, then click the Save button in the top-right corner. |
| Delete a Schedule | Open an existing schedule, click the red Delete button in the top-right corner, and confirm the deletion. |
| Remove a Recipient | Locate the user's card in the Users section and click the small "X" button on the right side of their card. |
| Reorder Report Widgets | Scroll to the bottom of the page to the "Widgets Order" list. Click and drag a widget to move it up or down to your preferred position. |
Tips
- Mind the Recipient Limit: You can select a maximum of 10 users per schedule. If you need to send reports to a larger group, consider setting up an email distribution list in your email client and adding that single address as a user, or create duplicate schedules.
- Widget Availability: If you cannot find a specific widget in the dropdown, check your "Repeat" frequency. The system automatically filters the available widgets to match the selected schedule frequency (e.g., certain widgets are only available for daily schedules).
- Prioritize Layout: Use the drag-and-drop "Widgets Order" list to place your most critical metrics at the top of the email so recipients see the most important data first.