Product Checklist Submission Detail - Workflow
Last updated on: July 29, 2026 | Updated by: MAGNI Docs Team
This page provides a detailed guide to the Checklists Product Submissions QA Supervisor — Response Detail page in the Magni Learning Management System (LMS).
Overview
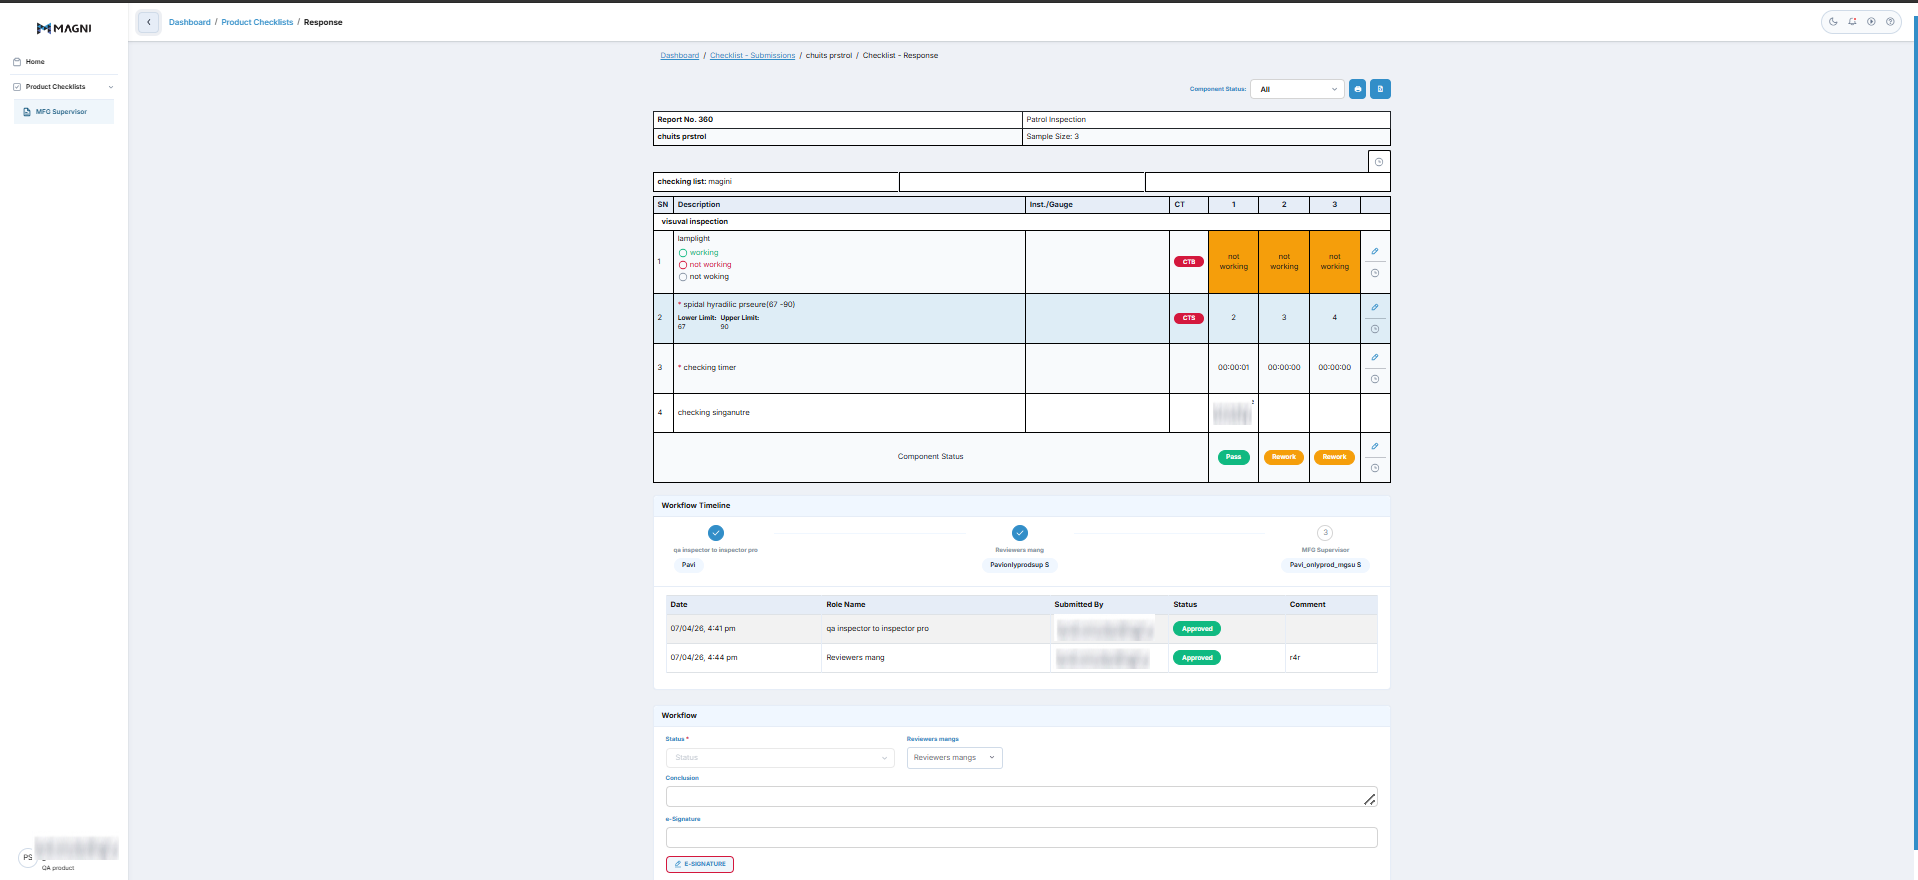
The Checklists Product Submissions QA Supervisor — Response Detail page allows QA Supervisors, Operators, and Administrators to review, analyze, and manage completed checklist submissions. This page provides a comprehensive view of all responses, metadata, and approval workflows, enabling quality assurance teams to verify compliance, filter responses by status, and export submission details for external reporting.
Page Sections
Navigation Breadcrumbs
The breadcrumbs at the top of the page adapt dynamically based on your user role and how you navigated to the page:
- Operators:
Dashboard→Checklists→Checklist Submissions→[Submission Title] - Report Viewers:
Dashboard→Checklist Reports→[Submission Title] - Supervisors:
Dashboard→Checklist - Submissions→[Checklist Name]→[Submission Title]
Action Bar
The top-right action bar contains tools for filtering, printing, exporting, and deleting the submission.
- Component Status Filter:
- Only visible for Product Checklists (excluding Min/Max checklists).
- Allows you to filter the checklist responses displayed on the page. Options include:
- All: Displays all responses.
- Pass: Displays only responses marked as passing.
- Rework & Scrap: Displays only responses requiring rework or scrap actions.
- Print Button (Printer Icon): Generates a print-friendly view of the checklist submission. This button is disabled if the submission has been bypassed or if a print job is currently loading.
- Export to Excel Button (Excel Icon): Exports the checklist submission details and responses to an Excel spreadsheet. This button is disabled if the submission has been bypassed.
- Delete Button:
👤 Visible to: Administrators (when navigating via the Admin route and possessing delete permissions).
- Permanently deletes the checklist submission. Clicking this button triggers a confirmation dialog before deletion.
Checklist Information Header
This section displays high-level metadata about the checklist submission:
- Alert Indicators: Visual icons appear next to the checklist name to highlight potential issues:
- Red Alert Circle: Indicates a critical alert.
- Yellow Warning Triangle: Indicates a non-critical warning.
- Red Envelope Outline: Indicates that an automated notification email failed to send.
- Checklist Name & Description: Displays the official title and instructional description of the checklist.
- Audit Score Tag: For checklists categorized as audits, a colored tag displays the calculated checklist score.
- Submission Metadata:
- Submitted on: The exact date and time the checklist was submitted.
- Submitted by: The name of the operator who completed and submitted the checklist.
- Duration: The total time taken to complete the checklist, formatted as
HH:mm:ss.
Response Details & Metadata
This section displays the individual questions, answers, and comments recorded during the checklist execution.
- Metadata Response View: Displays contextual information captured during the submission (such as machine IDs, batch numbers, or environmental conditions).
- Product Checklist Responses: Shows the detailed pass/fail status, measurements, and operator notes for each checked component.
Approval Workflow
If configured, the approval workflow section tracks the sign-off progress for the submission across different supervisor roles:
- QA Inspector Workflow
- QA Supervisor Workflows
- MFG (Manufacturing) Supervisor Workflows
- QA Manager Workflows
Each workflow section displays the current status of the review, which may include:
- Approved
- Concession Approved
- Rejected
- Production
- Setting Correction
- Deviation Request
Common Actions
| Action | How to do it |
|---|---|
| Filter Responses by Status | Click the Component Status dropdown in the action bar and select All, Pass, or Rework & Scrap. |
| Print Submission | Click the Print (Printer) button in the top-right action bar. |
| Export to Excel | Click the Export to Excel (Excel) button in the top-right action bar to download a .xlsx file. |
| Delete Submission | (Admins Only) Click the red Delete button in the action bar, then confirm the action in the pop-up dialog. |
Tips
- Quickly Identify Failures: Use the Component Status filter to select Rework & Scrap to instantly isolate failed components without scrolling through long checklists.
- Check for Failed Notifications: Always look out for the red envelope icon in the header. If visible, it means the automated email notification failed to send, and you may need to manually notify the relevant supervisor or team.
- Verify Duration: Review the Duration field to ensure operators are spending an appropriate amount of time conducting thorough inspections rather than rushing through the checklist.