Last updated on: 2026-05-26 | Updated by: MAGNI Docs Team
Enrollment Keys — Edit
Overview
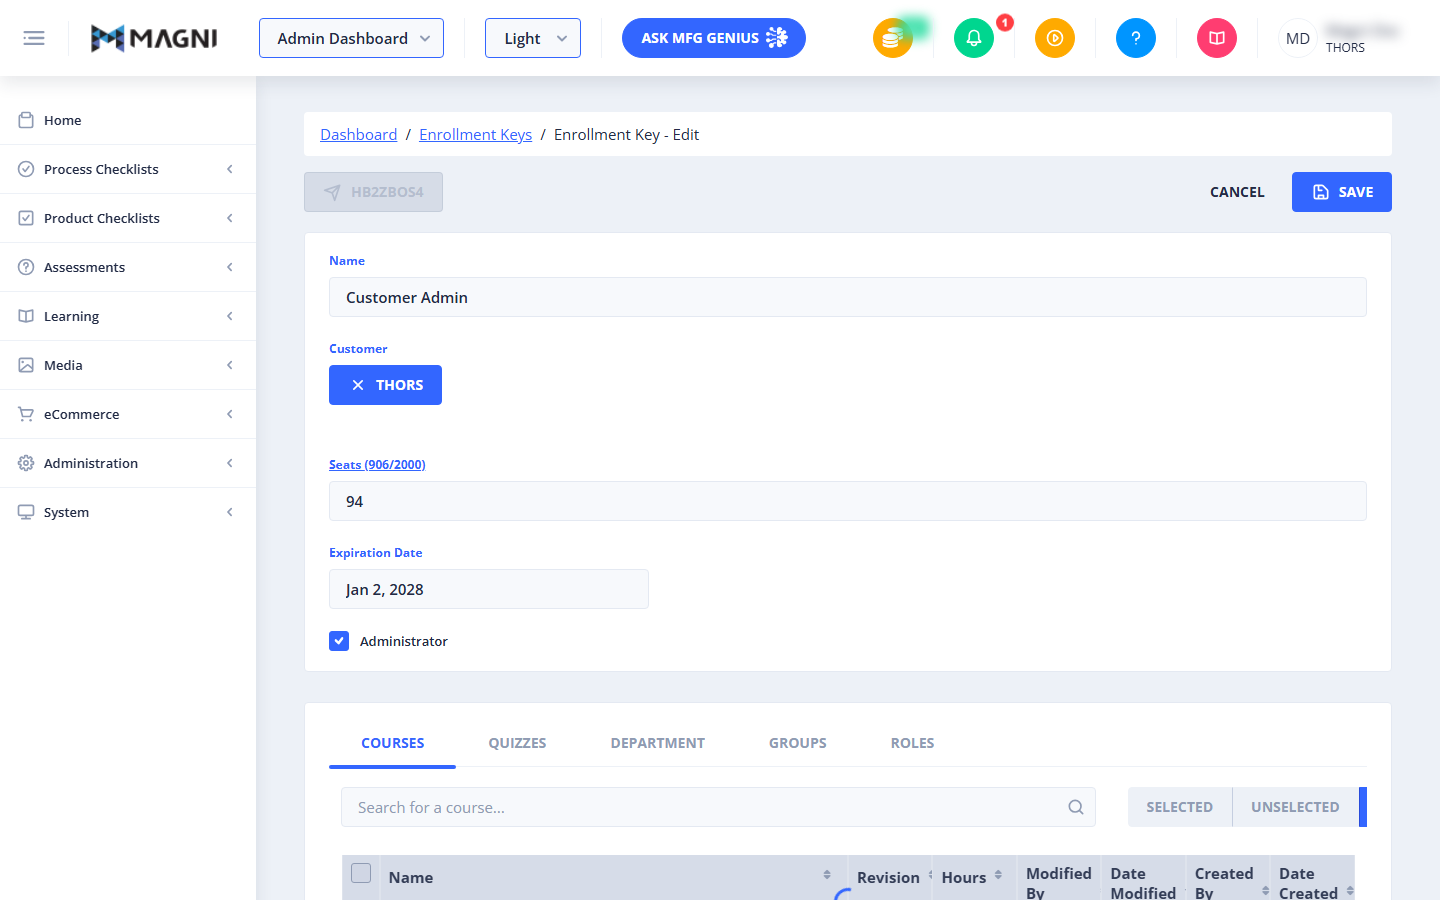
The Enrollment Keys — Edit page allows administrators to modify the configuration of an existing enrollment key. Enrollment keys are unique registration codes that automatically assign roles, departments, groups, courses, and quizzes to users when they sign up.
This page is primarily used by Administrators and System Administrators to manage seat allocations, update expiration dates, and adjust the learning paths associated with specific registration keys.
Page Sections
Header Actions
The header bar contains the primary actions for managing the enrollment key:
- Key Token Display: A disabled button on the left displaying the unique enrollment key code (e.g.,
HB2ZBOS4). If no token is generated yet, it displays "Enrollment Key". - Cancel Button: Discards any unsaved changes and returns you to the Enrollment Keys list.
- Save Button: Saves your changes. This button is only active when all required fields are valid and at least one role is assigned to the key.
Enrollment Key Details
This section contains the core settings for the enrollment key.
-
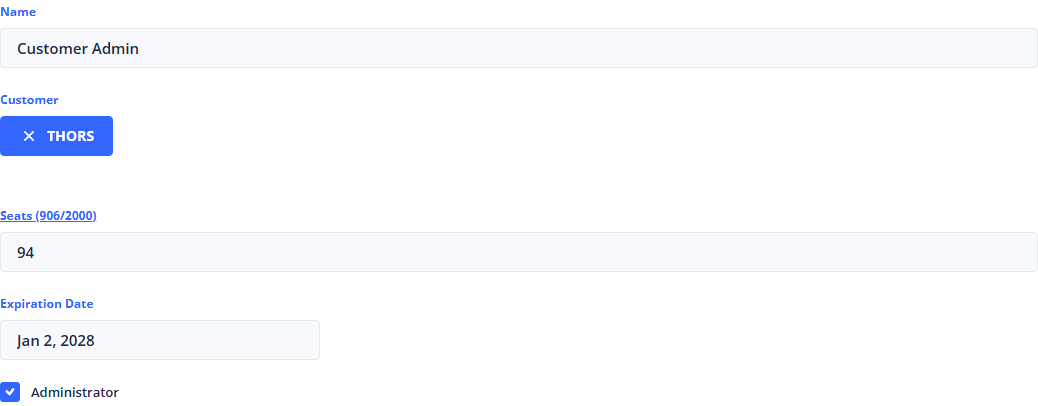
Name (Required): A descriptive name for the enrollment key (e.g., "Customer Admin") to help identify its purpose in administrative lists.
-
Customer Selection (Conditional):
👤 Visible to: THORS Administrators
Allows you to associate the enrollment key with a specific customer organization.
- If no customer is currently selected, a search bar and a table of customers (with sortable Name and Website columns) will appear.
- If a customer is already selected, it displays as a blue button with the customer's name. Click the X on this button to remove the customer and search for a new one.
-
Seats (Required): The maximum number of users who can register using this key. This must be a number greater than or equal to 0. The label displays the seat allocation status in the format
(Used Seats / Total Seats)for the selected customer. Hovering over the label displays a tooltip explaining how the seat count is calculated. -
Expiration Date (Required): The date when the enrollment key will expire and no longer accept new registrations. You can type the date or select it using the calendar picker. The expiration date must be set to today or a future date.
-
Administrator Checkbox: When checked, any user who registers using this enrollment key will automatically be granted Administrator privileges within their organization.
Validation Warnings
If the enrollment key configuration does not meet the system requirements, a warning banner will appear:
- At least one role must be selected: This warning appears if you have not assigned any roles to the enrollment key. You must select at least one role in the Roles tab before you can save your changes.
Assignment Tabs
The bottom portion of the page features a tabbed interface for managing what is assigned to users who register with this key.
Courses Tab
👤 Visible to: Users with LMS access enabled for their organization
Allows you to select which courses are automatically assigned to users upon registration. You can search for courses, filter by selected/unselected status, and check the boxes next to the courses you wish to include.
Quizzes Tab
👤 Visible to: Users with Assessment access enabled for their organization
Allows you to select which quizzes are automatically assigned to users upon registration.
Department Tab
Allows you to designate a single department that new users will be automatically added to.
- If a department is already selected, it displays as a blue button. Click the X on the button to remove it. Only one department can be assigned to an enrollment key.
- If no department is selected, use the search bar to find and select a department from the list.
Groups Tab
Allows you to assign registering users to specific user groups automatically.
Roles Tab
Allows you to assign system roles to users registering with this key. Remember that at least one role must be selected to successfully save the enrollment key.
Common Actions
| Action | How to do it |
|---|---|
| Change the Key Name | Click inside the Name field, enter the new name, and click Save. |
| Adjust Seat Allocation | Enter the new number of allowed registrations in the Seats field, then click Save. |
| Extend Expiration Date | Click the Expiration Date field, select a new future date from the calendar picker, and click Save. |
| Toggle Admin Privileges | Check or uncheck the Administrator checkbox, then click Save. |
| Assign a Department | Go to the Department tab. If a department is already selected, click its X button to clear it. Search for the desired department and select it from the results. |
| Assign Courses | Go to the Courses tab, search for the courses you want to assign, check their respective selection boxes, and click Save. |
Tips
- Monitor Seat Limits: Always check the seat utilization ratio displayed next to the Seats label to ensure you are not allocating more seats than your customer account has available.
- Set Realistic Expiration Dates: Setting an expiration date helps maintain security by ensuring registration codes do not remain active indefinitely.
- Verify Role Assignments: If the Save button is disabled, check for the yellow warning banner. Ensure you have selected at least one role in the Roles tab to enable saving.