Admin Codes Wizard Step 1
Last updated on: 2026-05-25 | Updated by: MAGNI Docs Team
This page is the first step in the Admin Codes Wizard, allowing administrators to create and manage access codes for assessments within Magni. It guides you through defining the basic properties of a new access code, starting with its name.
Page Sections
Access Code Details
This section allows you to define the name for your new access code. The wizard's progress is displayed at the top, showing the current step ("Name") and upcoming steps: Expiration Date, Quizzes, Notifications, and Review.
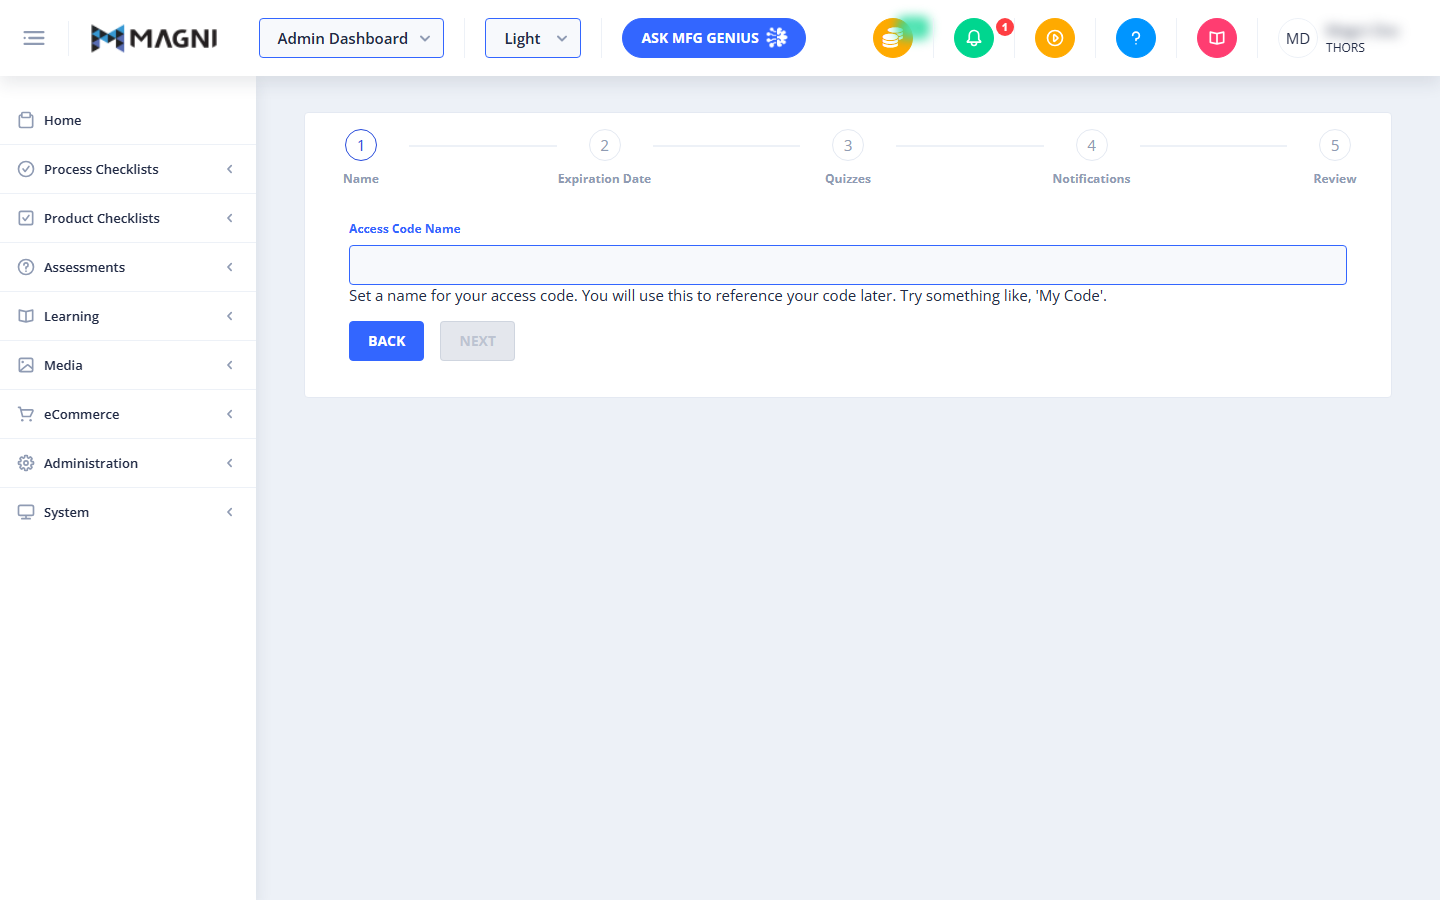
- Access Code Name (Text Input, Required): Enter a unique and descriptive name for your access code. This name will be used to identify and reference this specific code throughout the Magni system. For example, you might use "Spring 2024 Biology Exam" or "New Employee Onboarding".
- Purpose: To provide a recognizable identifier for the access code.
- Required: Yes. You must enter a name before you can proceed to the next step.
- Tooltip: Hovering over or clicking the input field will display "Set a name for your access code here".
- Guidance: "Set a name for your access code. You will use this to reference your code later. Try something like, 'My Code'."
Common Actions
| Action | How to do it |
|---|---|
| Back | Click the Back button to return to the previous page, typically the list of existing access codes. |
| Next | Click the Next button to proceed to the "Expiration Date" step of the wizard. This button is disabled until you enter a name in the "Access Code Name" field. |
Tips
- Choose a clear and concise name for your access code that reflects its purpose or the group of users it is intended for. This will make it easier to manage your codes later.
- The wizard is designed to guide you through five distinct steps. You are currently on the first step, "Name."
- Remember that the "Next" button will remain disabled until you provide a name for your access code, as this is a required field.