Process Checklist Setting — Alerts
Last updated on: 2026-05-26 | Updated by: MAGNI Docs Team
The Process Checklists Alerts page allows administrators to configure automated email notifications for specific checklist events. This ensures that the right team members are immediately notified when a checklist is submitted, when a non-conformance issue is flagged, or when a checklist reminder is missed.
👤 Visible to: Checklist Administrators, System Administrators
Page Sections
The Alerts configuration interface is divided into three main configuration tabs, each managing a different type of automated notification.
Info Banner
A blue informational banner is displayed at the top of the page. It serves as a reminder that if both Email and SMS contact details are configured for a user, the system will default to sending email notifications.
Alert on Submission
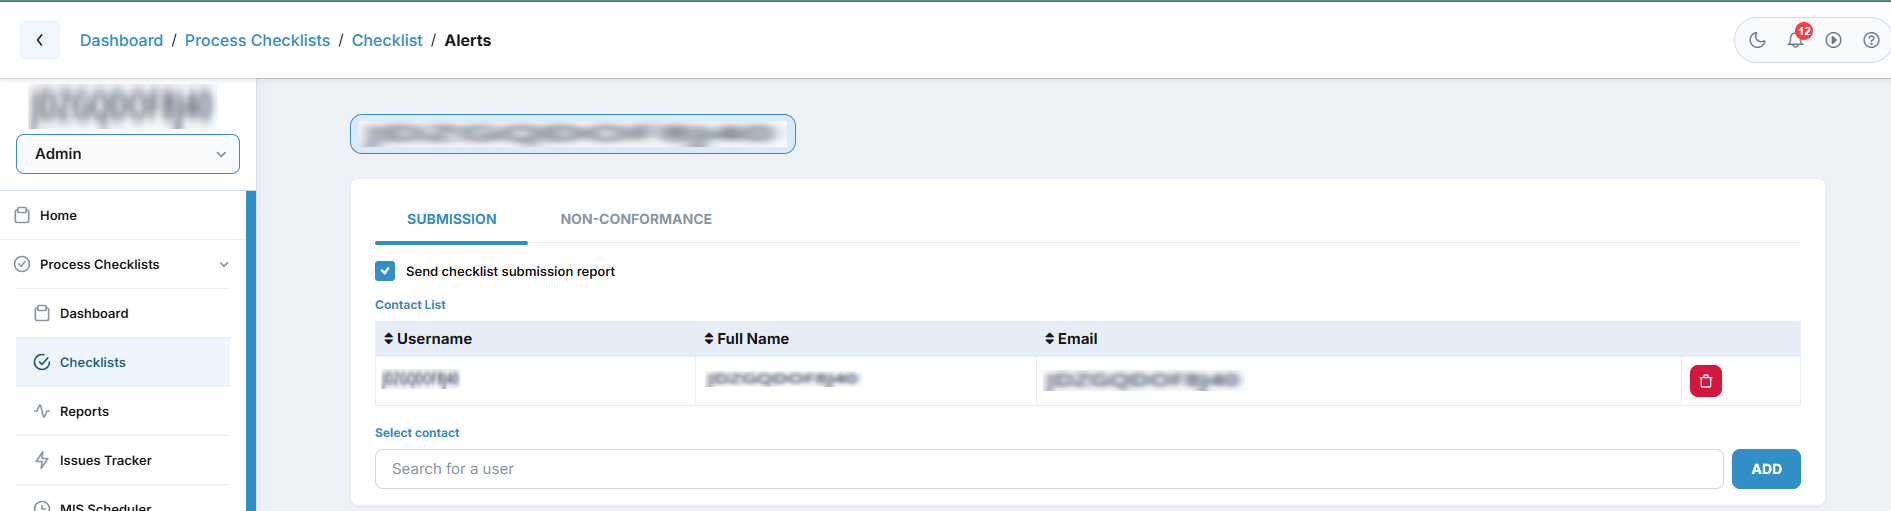
This section controls the notifications sent immediately after a user completes and submits a checklist.
- Send checklist submission report: Toggle this to enable or disable submission alerts entirely.
- Contact List: Displays a table of all users configured to receive submission alerts. You can sort this table by Username, Full Name, or Email.
Alert on Non-Conformance
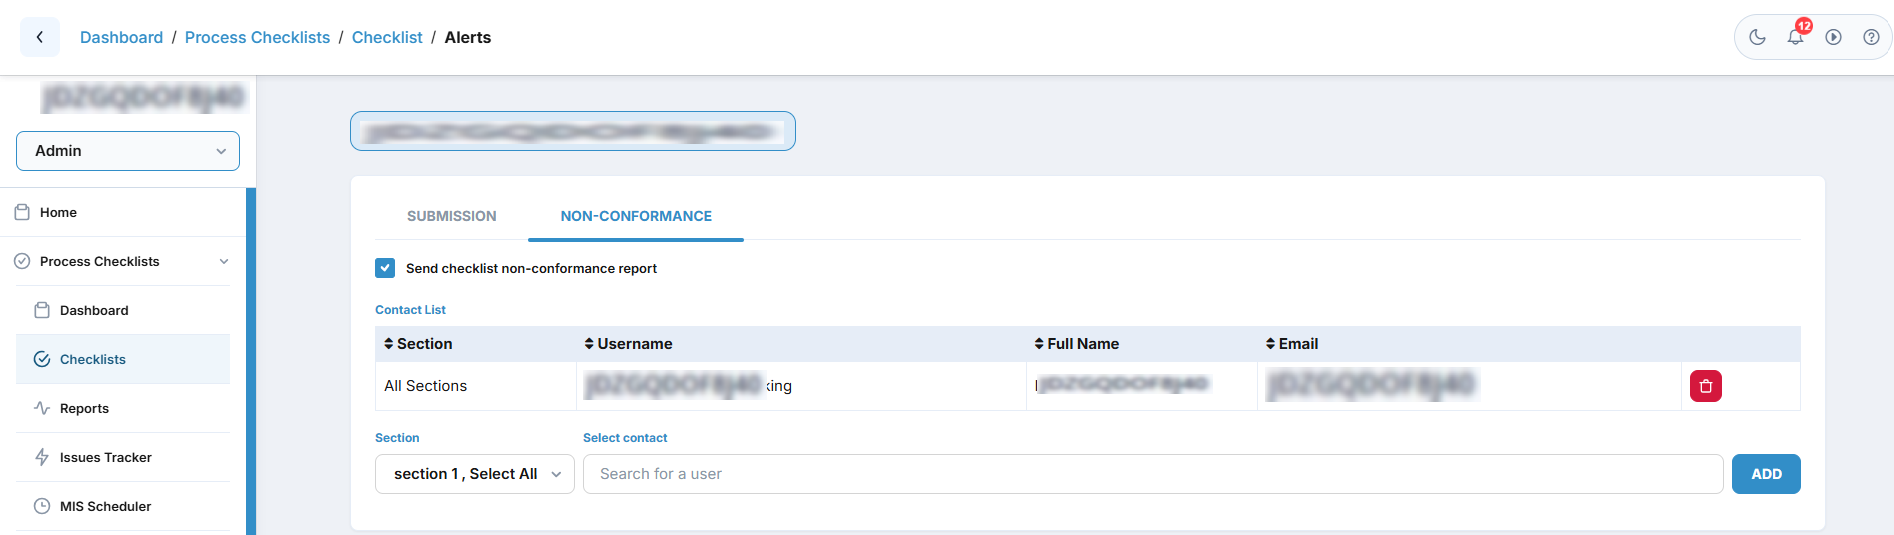
This section controls notifications triggered when a user answers a checklist question with a response that indicates a non-conformance.
- Send checklist non-conformance report: Toggle this to enable or disable alerts for non-conforming answers.
!-- - Email Configuration:
- Use Default Checkbox: Toggle to use the standard system-generated non-conformance email template.
- Subject Textarea: (Only available when "Use Default" is disabled) Enter a custom subject line for the non-conformance email.
- Body Textarea: (Only available when "Use Default" is disabled) Enter custom body text for the email notification. -->
- Contact List: Displays a table of all users configured to receive non-conformance alerts.
Common Actions
| Action | How to do it |
|---|---|
| Enable an Alert Type | 1. Locate the card for the alert type you want to enable. 2. Check the primary activation checkbox at the top of the card (e.g., "Alert on Submission"). |
| Customize Email Content | 1. Enable the alert type. 2. Uncheck the Use Default checkbox. 3. Fill in the custom Subject and Body textareas with your preferred notification text. |
| Add a Contact to a List | 1. Scroll to the Contact List section under the active alert. 2. Use the search field to find the user by name or email. 3. Select the user to add them to the alert distribution list. |
| Remove a Contact from a List | 1. Locate the contact in the Contact List table. 2. Click the delete/remove action button in the rightmost column of their row. |
Tips
- Use Default Templates First: Start by using the default system templates. They are pre-configured to deliver clear, structured information without requiring manual setup.
- Include User Responses: For submission alerts, keep the "Include user response" option enabled so managers can quickly review checklist answers directly from their email client without needing to log into Magni.
- Keep Contact Lists Updated: Regularly audit the Contact Alert Lists for each checklist to ensure notifications are sent to active personnel who can quickly respond to non-conformances or missed deadlines.