Product Checklist Setting — Tagging
Last updated on: 2026-05-26 | Updated by: MAGNI Docs Team
The Product Checklists — Tagging page allows administrators to assign organizational tags to specific product checklists. By tagging checklists, you can easily categorize, filter, and manage them across your organization's library.
👤 Visible to: Administrators and Content Managers
Page Sections
Breadcrumb Navigation
The breadcrumb trail at the top of the page helps you keep track of your location within the Magni LMS. It displays the path from your Dashboard to the current tagging page. Clicking any active link in the breadcrumb trail will return you to that page. If the checklist is currently in a draft state, the breadcrumb link will direct you to the draft version; if it is published, it will direct you to the published version.
Tag Selection and Creation
This section allows you to select and assign tags to the current product checklist.
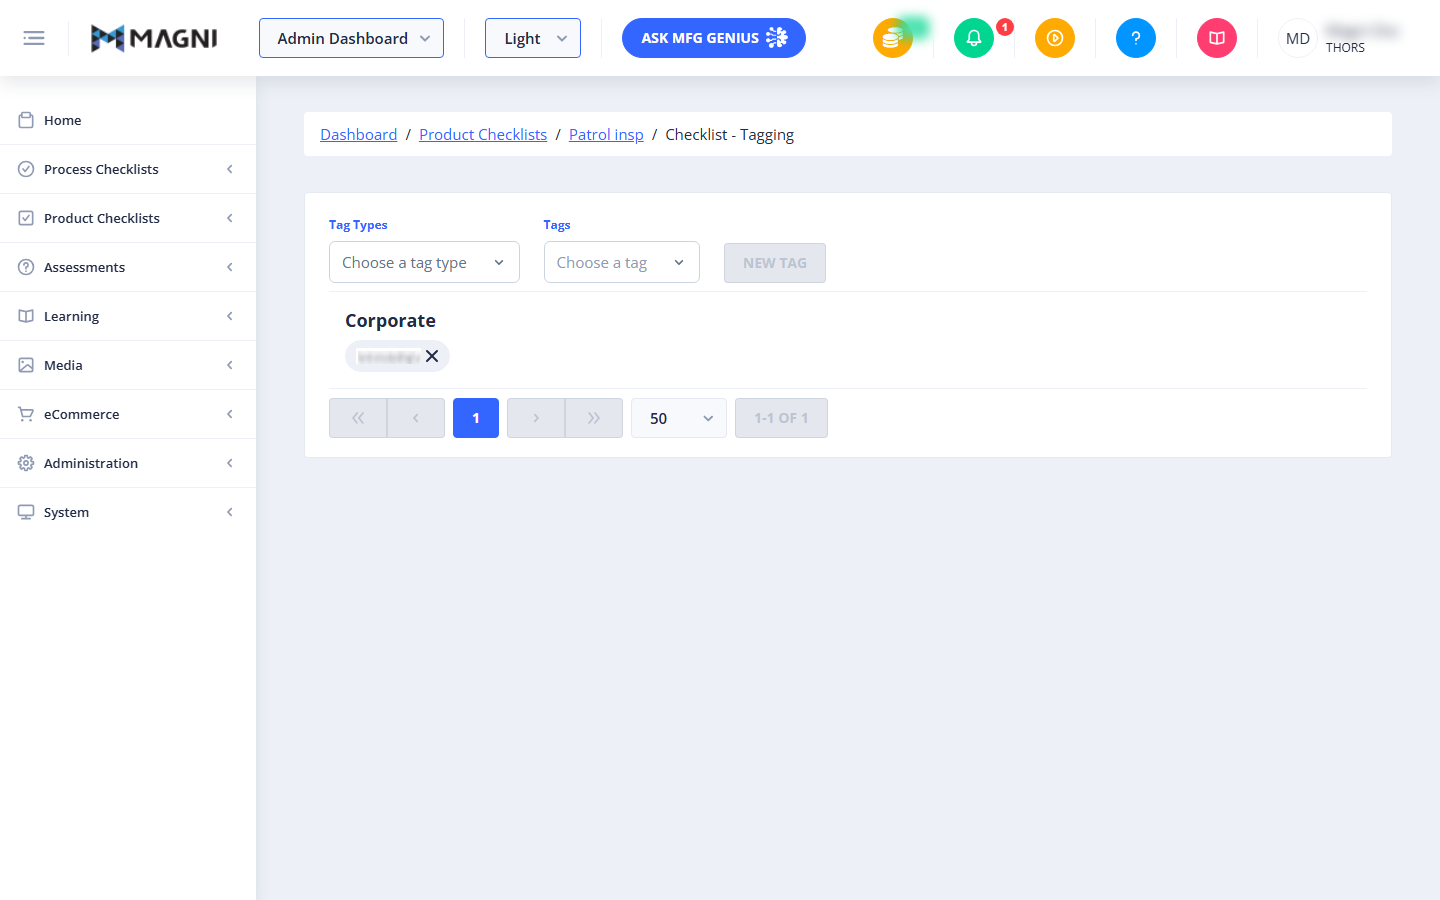
- Tag Types Dropdown: Click this dropdown to select the category or classification of the tag you want to apply (for example, "Corporate").
- Tags Dropdown: Once a Tag Type is selected, use this dropdown to choose the specific tag you want to assign to the checklist.
- New Tag Button: Click this button to apply the selected tag to the checklist. This button remains disabled until you select both a Tag Type and a Tag.
Assigned Tags List
This area displays all tags currently assigned to the checklist, grouped by their respective Tag Types.
- Tag Group Heading: Displays the category name (for example, "Corporate").
- Tag Badge: Displays the name of the assigned tag (for example, "THORS").
- Remove Tag (X): Clicking the "X" icon on any tag badge immediately unassigns that tag from the checklist.
Pagination Controls
Located at the bottom of the tag list, these controls help you navigate through assigned tags if you have a large number of them.
- Navigation Arrows: Use the first, previous, next, and last page buttons to navigate through pages of tags.
- Items Per Page Dropdown: Choose how many tags to display per page (defaults to 50).
- Page Indicator: Displays the current page and the total number of tags assigned.
Feature Not Enabled State
If your organization does not have Product Checklists enabled in your account settings, the tagging interface will be hidden, and a "Feature Not Enabled" message will display on the screen instead. If you see this message, contact your system administrator to enable the feature.
Common Actions
| Action | How to do it |
|---|---|
| Add a tag to the checklist | 1. Click the Tag Types dropdown and select a category. 2. Click the Tags dropdown and select the desired tag. 3. Click the New Tag button to save the tag to the checklist. |
| Remove a tag from the checklist | 1. Locate the tag badge under its category heading. 2. Click the X icon on the right side of the tag badge to remove it. |
| Change the number of tags displayed | Click the pagination dropdown at the bottom of the page and select your preferred number of items to display per page (e.g., 50). |
Tips
- Establish a Tagging Strategy: Before tagging checklists, define a clear set of Tag Types and Tags with your team to ensure consistent categorization across all product checklists.
- Quick Cleanup: You can quickly remove outdated tags by clicking the "X" on their badges without needing to open any edit menus.
- Checklist Status: The breadcrumb trail dynamically updates to show whether you are tagging a "Draft" or "Published" version of a checklist, helping you ensure you are editing the correct version.